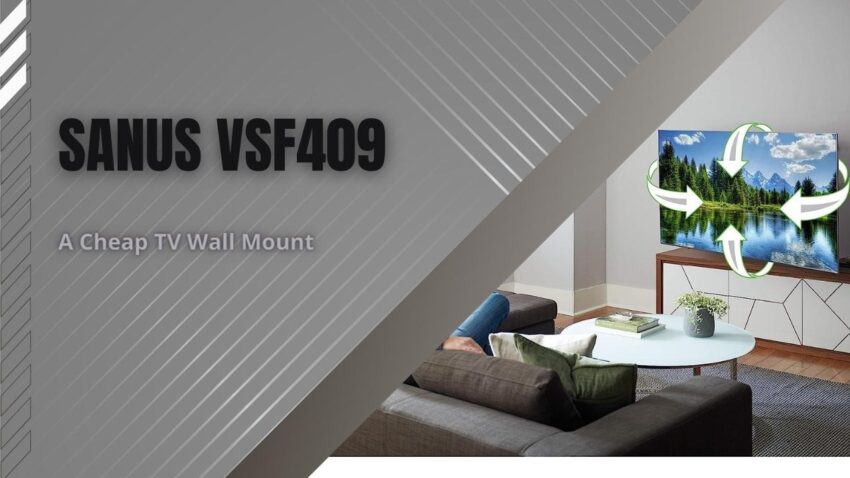
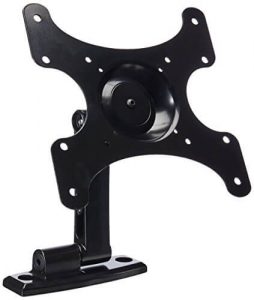
The Sanus VSF409 is perfection. It comes at a low cost considering the price it costs for all that it does. Granted it only supports the smaller sizes of TVs, it still offers a good amount of value.
Plus since it is a Sanus wall mount it will offer quality build parts. It pans, tilts, swivels, and rolls. Not to mention that it can extend out a bit from the wall for easy cable management. If you have a small TV that needs mounting, this will be one of the best options.
Sanus VSF409 Details
Specification:
- Product Brand: SANUS
- Model Code: VSF409
- Wall Mount Width: 11.73″ / 29.79cm
- Wall Mount Height: 9.60″ / 24.38cm
- Wall Mount Depth: 3.18″ – 9.18″ / 8.08cm – 23.32cm
- Wall Mount Weight: 6.18lbs / 2.80kg
- TV Size Range: 13″ – 39″ / 33.02cm – 99.06cm
- Maximum TV Weight: 50lbs / 22.68kg
- Degree of Pan: 90° / -90°
- Degree of Tilt: 15° / -15°
- Degree of Roll: 180° / -180°
- Degree of Swivel: 15° / -15°
Supported VESA Patterns
To the left, you’ll find a VESA Pattern and on the right a corresponding TV so you can get a feel for how large the TV actually is this wall mount supports. This is a work in progress that I’ll work on over time as I review more TVs.
- VESA 100 x 100
- VESA 100 x 200
- VESA 200 x 100
- VESA 200 x 200
- VESA 75 x 75
Tools You Will Need For Installation
To make things as easy as possible you are going to need some tools. Sanus tends to provide the needed tools, but if not below are the needed tools to properly set the VSF409 wall mount up.
- 7/32″ Drill Bit
- drill-bit
- 3/8″ Masonry Bit (Concrete)
- 1/2″ Socket Wrench
- wrench
- Electric Drill
- Hammer
- hammer-trt
- Pencil
- Phillips Head Screwdriver
- screw-driver
- Tape Measure
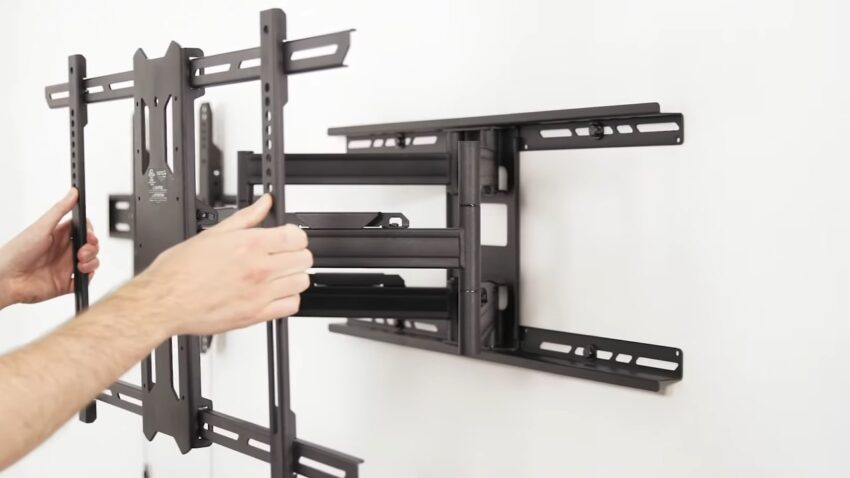
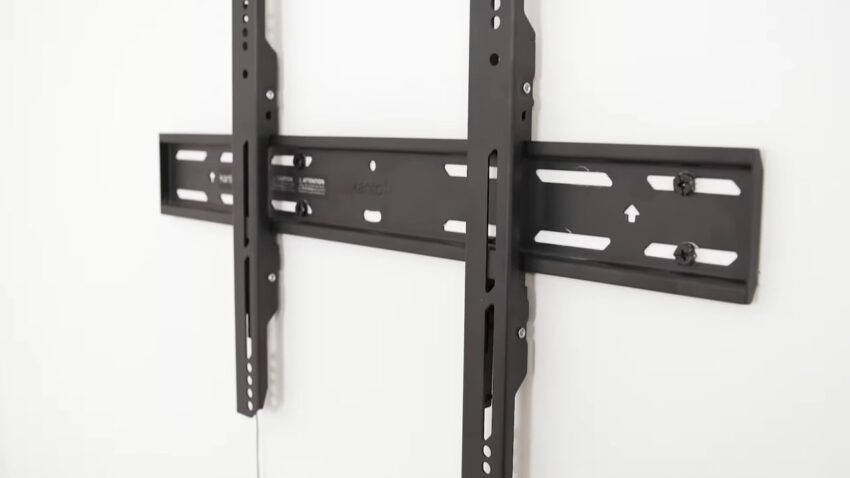
How To Install The SANUS VSF409
Life could not be any better with the instructions that come with the Sanus wall mounts. It’s always a simple 1, 2, 3 process that anyone can follow. If you hit a snag below are the steps with a more detailed sub-step below that. Good luck!
Step 1 – Wall Bracket
1-1 Find the TV screws and insert them into the back of the TV.
1-2 Determine if the provided spacers are needed.
1-3 Measure your TV’s VESA pattern
1-4 Using the correct bracket, attach it to the VESA holes on your TV.
Step 2 – Wall Plate
2-1 If using the stud finder, find the studs in your wall
2-2 If you have concrete walls, measure and apply wall anchors.
2-3 Once holes are made or anchored, attach the wall plate to the wall.
Step 3- Attach Bracket to Wall Plate
3-1 Final Step The locking tab needs to be in the unlocked position before attaching the TV to the wall plate. Once the TV is on the wall plate, the locking tab needs to be in a locked position.
HEAVY! YOU MAY NEED ASSISTANCE WITH THIS STEP.
If you find yourself needing a small wall mount for a small TV, you need not go any further. The VSF409 is perfect. Easy instructions with tons of mobility.
High-Quality Build
When it comes to the build quality of the Sanus VSF409 wall mount, you can expect nothing short of excellence. Sanus is renowned for producing durable and reliable products, and the VSF409 is no exception. This wall mount is meticulously crafted with top-notch materials and impeccable craftsmanship to ensure long-lasting performance and secure TV placement.
The importance of a well-built wall mount cannot be overstated. It serves as the foundation for safely holding your TV in place, providing stability and peace of mind. With the Sanus VSF409, you can trust that your TV will be securely mounted, allowing you to enjoy your favorite shows and movies without any worries about stability or potential accidents.
Ideal for Small TVs
The Sanus VSF409 is specifically designed to cater to the needs of smaller-sized TVs. It offers an ideal solution for TVs ranging from 13 inches to 39 inches in size. Despite its focus on smaller TVs, this wall mount doesn’t compromise on functionality or value. It is carefully engineered to provide excellent support and flexibility, ensuring an optimal viewing experience for your compact TV.
With a maximum weight capacity of 50 pounds, the VSF409 can handle a wide range of smaller TVs available on the market. Whether you have a compact TV in your bedroom, kitchen, or any other space, this wall mount is perfectly suited to accommodate it while offering outstanding value and functionality.
Recommended Tools for Installation
To successfully install the Sanus VSF409 wall mount, it is recommended to have the following tools on hand:
- 7/32″ Drill Bit: Required for drilling pilot holes in the wall.
- 3/8″ Masonry Bit (Concrete): Necessary if you have concrete walls.
- 1/2″ Socket Wrench: Used to tighten the necessary bolts and screws.
- Electric Drill: Helps with drilling holes and driving screws.
- Hammer: Useful for any necessary adjustments or securing wall anchors.
- Pencil: Used for marking the wall and guide holes.
- Phillips Head Screwdriver: Required for tightening screws.
- Tape Measure: Essential for measuring distances accurately.
While Sanus typically provides the necessary tools with their wall mounts, it’s always beneficial to have your own set of tools available during the installation process. This ensures that you have everything you need to complete the installation efficiently and effectively.
FAQ
How far does the Sanus VSF409 wall mount extend from the wall?
The Sanus VSF409 wall mount has a depth range of 3.18 inches to 9.18 inches (8.08 centimeters to 23.32 centimeters). It can extend outwards from the wall to provide easy access for cable management and connections.
Are the installation instructions provided with the Sanus VSF409 wall mount easy to follow?
Yes, the Sanus VSF409 comes with clear and user-friendly installation instructions. The installation process typically follows a simple 1, 2, 3 step-by-step procedure, making it easy for anyone to set up. However, it’s important to read and follow the instructions carefully to ensure a secure and successful installation.
What are the recommended tools for installation?
The recommended tools for installing the Sanus VSF409 wall mount include a 7/32″ drill bit, 3/8″ masonry bit (if applicable for concrete walls), 1/2″ socket wrench, electric drill, hammer, pencil, Phillips head screwdriver, and tape measure. While Sanus typically provides the necessary tools, having your own set available can be helpful.
Can I install the Sanus VSF409 wall mount on different types of walls?
Yes, the Sanus VSF409 wall mount can be installed on various types of walls, including drywall with studs and concrete walls. However, additional steps may be required for concrete walls, such as measuring and applying wall anchors. Ensure that you follow the installation instructions specific to your wall type for secure mounting.
Is it recommended to seek assistance for the final step of attaching the TV to the wall mount?
Yes, the final step of attaching the TV to the wall mount may require assistance, as it can be heavy and require proper alignment. Having someone help you with this step ensures that the TV is safely and securely mounted onto the wall plate.